Configuring Azure Blob storage
Thanks to Azure Storage Explorer, working with blobs on a storage account is very similar and just as easy as working on a file share. For this exercise, we will use the storage explorer built into the Azure portal. Since blob storage has no filesystem, it maintains a flat structure; Azure implements logical folders to emulate a filesystem similar to that of file shares to make blobs easier to work with. For this exercise, you will create a blob container and upload a file using the portal. Proceed as follows:
- Navigate to the Azure portal and select a storage account resource you will use for the exercise. On the left menu, selectStorage Explorer (preview) and right-click on BLOB CONTAINERS on the right menu, then click Create blob container. The process is illustrated in the following screenshot:

Figure 6.37 – Creating a blob container
- Name it test and click Create, as illustrated in the following screenshot:

Figure 6.38 – New container
- Notice in the following screenshot the new container you just created. Click on the new container, click Upload, then select a file and click Upload:

Figure 6.39 – Uploading to blob
- You have now successfully completed an upload, as we can see here:

Figure 6.40 – Blob upload success
Now that you have successfully configured Azure blob storage, you will now learn how to configure storage tiers.
Configuring storage tiers
As described earlier in the chapter, there are three storage tiers available for Azure Blob storage—namely, hot, cool, and the archive tier, which can only be set at a blob level. The storage tier can be configured both on the creation of a storage account—for which settings apply for the entire account as a default value (these will reflect as inferred)—and at a blob level. Changing blob storage tiers allows for more granular control of the performance and reliability characteristics required of each blob, such as in backup-type solutions or for DR scenarios. The ability to change between tiers at any stage is available; however, bear in mind that tier changes result in pricing considerations, as the operations incur charges in the changing of tiers. For changes from hot to cool or archive, and from cool to archive, write charges will be incurred (operation and access charges). For archive to cool or hot, and from cool to hot, read charges will be incurred (operation and access charges).
We will now demonstrate the change of storage from hot to cool tier in the following activity:
- Open any storage account on the Azure portal.
- Upload a file to continue on your blob storage. For this exercise, we can use the container we created in the previous section.
- Navigate to your container and select the ellipsis icon (…) on the Overview section and click Change tier on the pop-up menu, as illustrated in the following screenshot:

Figure 6.41 – Changing storage tier
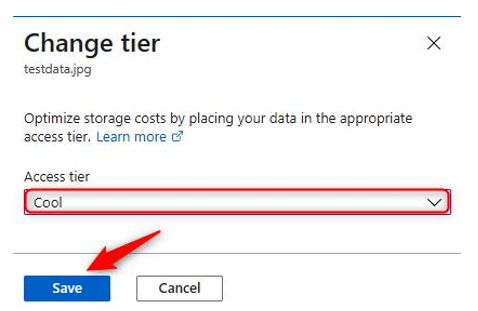
- Select the desired Access tier value and click Save, as illustrated in the following screenshot:

Figure 6.42 – Changing storage tier: Save
- Note in the following screenshot the change of access tier now applied to your blob, as well as the removal of (Inferred) from the tier:

Figure 6.43 – Changing storage tier: blob view
You have completed a storage-tier change in this activity. The same process can be applied to the archive tier, with the difference being that recovery from the archive tier requires storage to be rehydrated into cool or hot to be accessible.
We will now perform an exercise for changing storage to the archive tier and restoring the data, as follows:
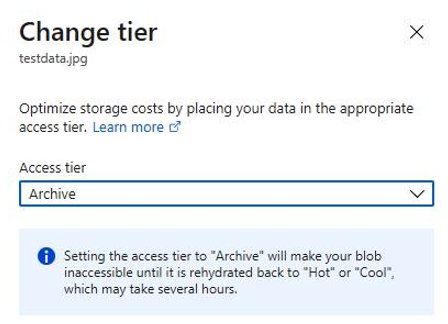
- Select the blob from the previous exercise and proceed to change the storage tier again. This time, selectArchive and click Save, as illustrated in the following screenshot:

Figure 6.44 – Changing storage tier: Archive tier
- Notice that if you attempt to open the blob, you get an informational message noting that the blob is archived. Click X to go to the previous screen, as indicated in the following screenshot:

Figure 6.45 – Changing storage tier: informational message
- Click Change tier, select the Access tier value on the pop-up menu, and select a Rehydrate priority type. Note that changing the priority from Standard to High will incur additional charges and is only required for critical recovery tasks. Click Save. The process is illustrated in the following screenshot:

Figure 6.46 – Changing storage tier: rehydrating storage
- You will need to give this a few hours to rehydrate; Microsoft notes that data can take up to several hours to restore. Once the operation is complete, you will notice the Access tier type has changed to the desired tier, as indicated in the following screenshot:

Figure 6.47 – Changing storage tier: rehydrated blob
You have completed the archive tier change as well as rehydrated data. This marks the end of the section on storage tiers, and you now understand how to manage tiering on blob storage within Azure. As part of the exam objectives, in the next section, you will learn about the Uniform Resource Locator (URL) construct for storage endpoints.